Sunday 9 November 2014

Modern Quilting, Modern Women

Crystal of Two Little Aussie Birds is running a series of interviews with prominent female quilters on her blog - take a look, it's really interesting getting to know the women behind the quilts.

She is also running a link up so that the rest of us can share a little about ourselves and what it means to be a modern, female quilter.  So here are my answers to her questions.


1. Tell us about how you started quilting and how you found modern quilting.
 
I started quilting in 2009.  My mother had unsuccessfully tried to get me to learn how to sew as a teenager but I staunchly refused, considering sewing something far too domestic and girly for me to be doing as a young feminist.  I avoided the sewing classes at school (no such luck with the typing classes but more of that anon) and was a bit smug about this.  However, as I entered the workforce I discovered that touch typing was possibly one of the most useful skills I had learned and started to regret my earlier attitude to sewing.  As I got older I became more interested in hand sewing and embroidery but it took me until 2009 to accept I wanted to learn how to sew.  I think the final straw was that I was involved in making a block for a wedding quilt for a friend and all I could manage to my shame was fussy cutting out a nice piece of material as a block and my mother in law helped me with this!  I loved the idea of quilting though and so decided I would learn how to sew by making quilts.

A google search put me in touch with my first teacher when I realised my limitations.  Trish has been a wonderful teacher, mentor and friend and it was her who introduced me to the modern aesthetic.  After meeting her I discovered the local modern quilting group through a magazine and started chatting with them online.  Once I got my hooks into modern quilting there was no stopping me!  I have become very involved in modern quilting facebook groups, swaps and bees, have been introduced to Instagram (@Jemimaquilts) and of course started a blog and then my own facebook page pretty early on in my journey.  I love the fact forums like the facebook groups allow a supportive place for people to discuss and share their ideas and creations and places like pinterest are an organic encyclopedia of ideas and patterns.  If  it had been a time when all I was exposed to what was going on in Australia, or even just Perth, I think I would be in a rut by now.  Instead I feel I am just on the tip of the iceberg with so many avenues to explore thanks to our global quilting family.

2. What does it mean to you to be a modern quilter and a modern woman? 
 
To me, any woman who has ever created quilts in the style of their day and community were and are modern quilters.  It was refreshing to me to discover that quilting was indeed still moving with the times too because I really found that after reading a few more traditional magazines, browsing more traditional fabrics and trying to make a traditional item or two, I was getting pretty depressed about the whole creative process.  I just wasn't drawn to these things, they didn't sit comfortably with my love of colour and desire to break the rules.

As for reconciling my identity as a modern woman with being a quilter, I think the two sit together very easily.  For me (and many others), quilting is a creative process, which happens to generally have a practical outcome.  It is art.  As I have an art history background, I have spent quite a bit of time exploring the ideas of what it is to be a female artist as well as the definition that was made for ages between art and craft.  I think the lines are blurring more there now and quilting is definitely both.  Not that we should worry about pigeonholes.  As modern women we should be doing whatever pleases us in our leisure time or as a career and if that is quilting then so be it.


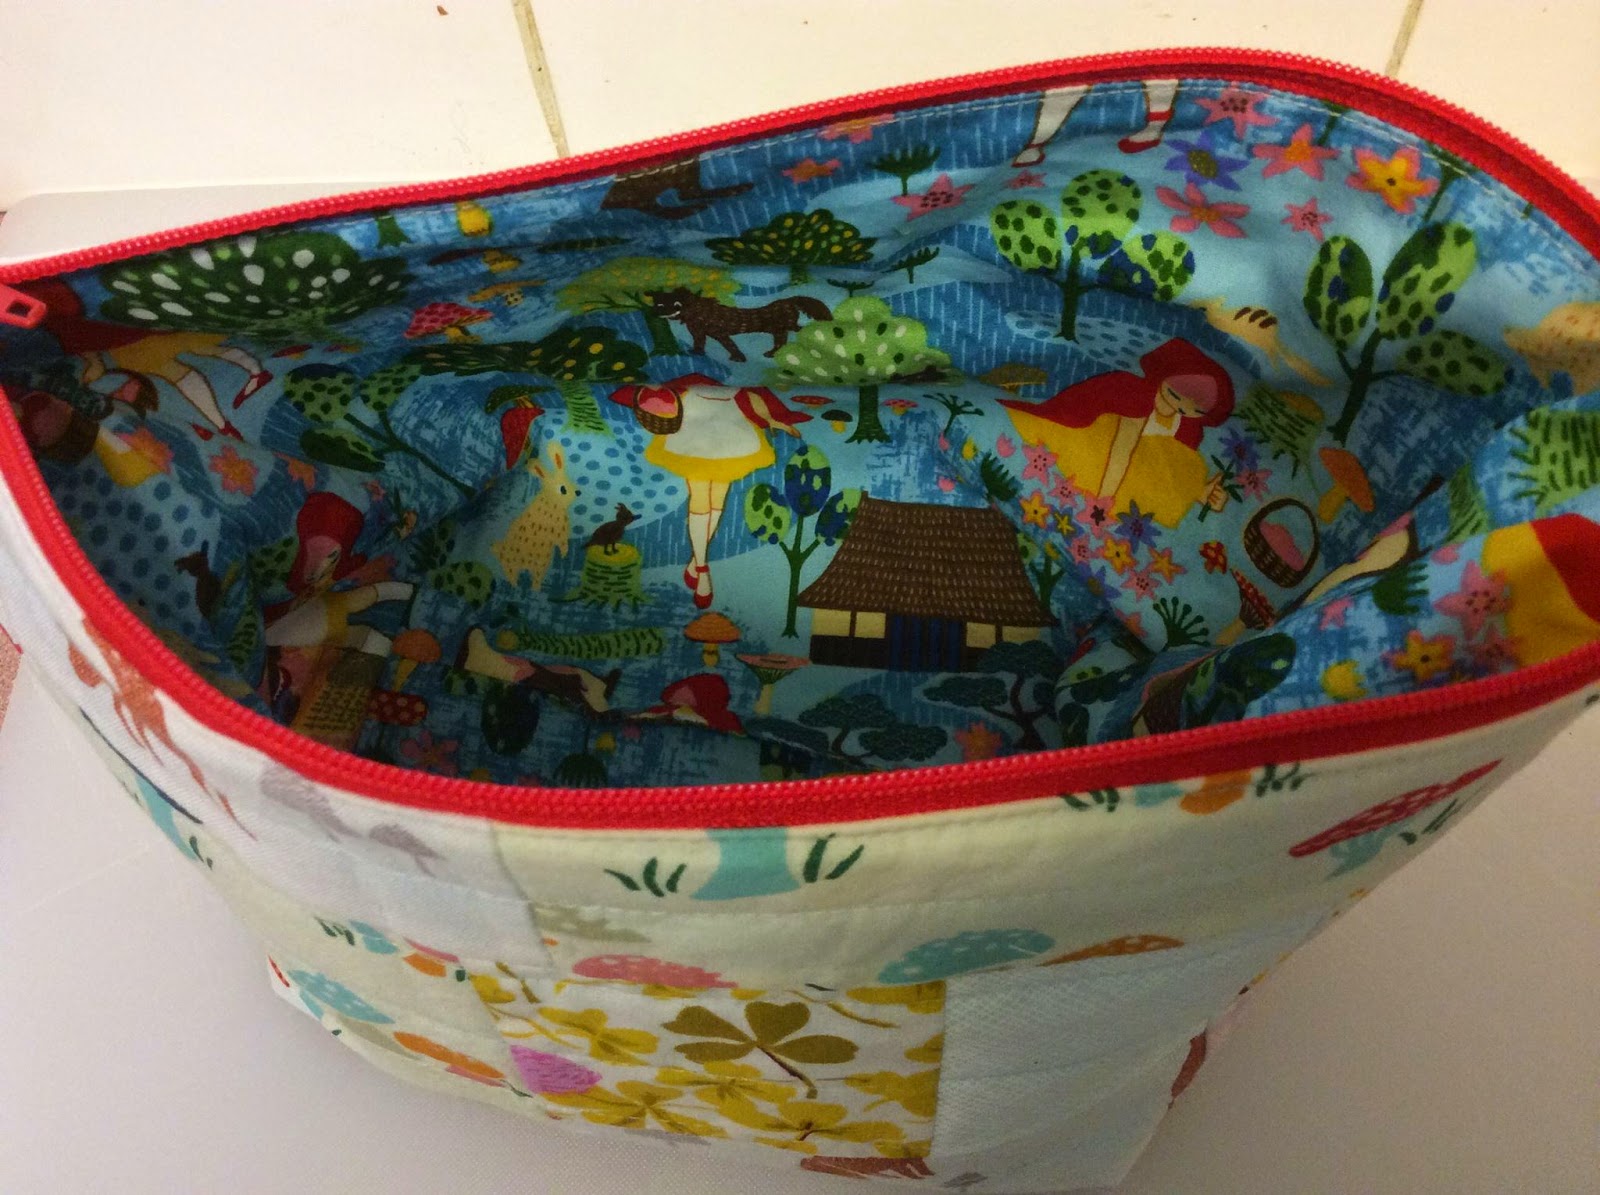
3. Which quilt that you have made represents you and why?
 
Every quilt I have made represents me in some way. However, if I were to choose one, which was a turning point for me, I would choose this modern medallion quilt:
It is still just the quilt top too by the way, which is an important statement to myself at the moment because the next step will include some free motion quilting, which I have been working on as well as straight line.  This thought process and planning of the quilting is showing me how the quilting itself is an integral but also independent part of the creative process.  Something it has taken me a while to come to understand and appreciate.

This quilt was doing as part of Crystal's online quilt along.  I feel so connected with this quilt because it was shared at every step with the wonderful online community we created and also because I took so many risks with it.  I deliberately challenged myself with the palette, the paper piecing and the minor alterations to the pattern, which Crystal supported and encouraged of all of us.  As it was a medallion quilt I had no real idea about how it would turn out when finished.  Every border was surprise and fortunately for me, always a wonderful one.  I had to trust my choices and aesthetic completely when it came to this quilt, which made it an incredible learning process.  I have to admit I was surprised about how well it turned out - far better than I expected from my slightly shaky paper piecing start with what seemed like a huge expanse of low volume fabric.  I was also surprised about how well received it has been online and on Instagram.  It has given me a huge confidence boost, both in my creative abilities and in how my work is now being perceived by people I respect and admire.


4. How do you connect with other modern quilters? What does it mean to you to have this sisterhood of modern women? 


I am an active member of our local modern quilt guild, which is new and growing, which is a great thing I think.  I am connecting further afield with modern quilters online, through blogs, facebook groups and other social media.  The conversations, ideas and images are so inspiring and reassuring.  There is nothing like being part of this international community where we all speak the same language.

I don't have any daughters to pass this onto but in the true modern quilting fashion, my young son is showing an interest in what I do and in the creative process.  He has had his first experience of sewing too and really enjoyed it.  Maybe we have another Quilt Dad, Molli Sparkles, Bill Kerr or Thomas Knauer in the making...and that in itself is the joy of modern quilting - where we are all quilters and the fact we are men or women becomes irrelevant.

Wednesday 8 October 2014

Swaps and Pouches

This is a bit of a catch up post to share pictures of some gifted items and showcase my new obsession - zip pouches!

Since learning how to insert a zip I have gone a little zippy bag crazy, which is no bad thing as they are varied, versatile, generally well received as gifts and are a great way to play with different fabric combinations and ideas instead of committing to a large quilt.  Cushions are now a bit of a favourite too for the same reasons but more of those another time. :)

This first one is a quickie  - a little Hello Kitty themed pouch for Mr 4's little friend, Miss 6.  It was for her birthday and whipped up quickly when we received the Hello Kitty invitation to the Hello Kitty themed birthday a few weeks ago.  She apparently loves it and is using it for her pencils.

I used Noodlehead's "open wide zip pouch" tutorial for this pouch.  I would link but it seems the site is down, hopefully only temporarily as it is a great tutorial.

Also using this tutorial I made this pouch for my very first swap gift:

 The theme was "Fairy Tale" and we were matched with a partner that would (hopefully) align with out sewing tastes and style.  My partner was the lovely Heidi from the USA, which was very exciting.  One of her likes was Red Riding Hood and she liked a bit of Heather Ross fabric amongst other things...
I made this pouch by improvisationally piecing the outer using low volume, woodland themed fabrics to try and capture the idea of a snowy woodland walk....
...and lined it with this fantastic Japanese Red Riding Hood fabric for a pop of colour and unexpected surprise inside!
 Because it was a swap, and you can never have enough little treats in a swap, I also made this little hexagonal coin purse/ear phone holder and allowed the Red Riding Hood fabric to take center stage.
I was a bit limited in how much I could send before postage would require a second mortgage but managed to squeeze in a few Australian themed goodies with these two items - some Aussie fabric fat quarters and some sweet treats...as well as a cute Red Riding Hood themed applique.

I can't wait for mine to arrive now!

Charming!

Been absent a bit longer than anticipated and therefore have a couple of posts to do.  You know how it is, working on secret and not so secret squirrel projects that you *can't* post about (or forget to post about, ahem) and then they all creep up on you!

So this first post is dedicated to a quilt top I whipped up in a frenzy of inspiration (and as I admitted on facebook, procrastination), and I am rather glad I did.

A few months back I joined my very first charm swap run by the super organised and lovely MsMidge.  Why did I join?  Because it was for fabric by possibly my most favouritest designer Bonnie and Camille!  (And not just because the current line is called Miss Kate, I'm not that shallow, honest...)

So for the uninitiated, a charm swap is a bunch of fabric enthusiasts tracking down fabrics (and sometimes trying to outdo each other), sometimes hard to find ones, cutting them up into little pieces (charm squares which are 5") and then sending them to the organiser who then drives herself crazy ensuring everyone in the swap gets one of each 112 charms...and then most people make something with them.

I am not a huge charm square fiend.  I have always found them a bit limiting but loved the idea of having 112 pieces of Bonnie and Camille fabric.  And of course once you have it, you get the urge to do something with it.  My urge just happened to hit late at night when I was trying to force myself to finish another project I wasn't so inspired about.  Hence it becoming a procrastination quilt.

I had found a few charm quilt designs on the web, which I liked as they kept the integrity of the charms (ie they were squares :) ) and this appealed (read, I didn't have to do much more cutting).  I decided to challenge myself to use as many of the 112 charms as I could and to use a solid other than white/off white or grey...given I wasn't challenging my cutting abilities.

I sorted the charms into colour families - yellow/orange, green, neutrals, reds, blues and pinks and set to work... 

Border after border like a square medallion quilt I suppose!
And this was the result - All except 4 of the charms were used, so I was pretty pleased about that.
The turquoise? aqua? or as I like to call it "Bonnie and Camille blue" was just what I wanted.  I can't remember what it is call exactly but it is in fact a linen and the pattern, I suppose, although inspired by things I have seen, is my own design and measurement.

The combination of florals, checks and pretty designs which Bonnie and Camille fabrics are known for plus the addition of the solid gives this quilt top a really retro 50s feel, which I love.  I can't wait for the opportunity to quilt it and finish it off!

The link up for the Bonnie and Camille Charm Along with Ms Midge runs until October 27.  Looking forward to seeing inspiring charm quilt ideas!

Monday 25 August 2014

Hedgehogs and squirrels and owls, oh my!

At a very enjoyable baby sprinkle (apparently this is name du jour for baby showers for second babies...) I finally gave my friend the quilted wall hanging she had requested for her baby boy's nursery.

There had been some guidelines (most of which I listened to :)) which included - "greens and browns please...and woodland animals, no, jungle animals...no...woodland animals.  Definitely woodland animals."  So I started making it before she could change her mind.  Fortunately she had ordered a decal with woodland creatures so it now seemed unlikely...

Green and brown can be very chic but also a little muted for this colour obsessed quilter so I took a lead from the aforementioned decal and threw in a bit of orange and blue too.   Just to liven things up a bit.

The main "picture" fabrics I chose were from the "Bluebell Park " line by Kate and Birdie.  I love them so much!

I had bought some of the beige park themed fabric along with all the supporting fabrics while I was in Melbourne in anticipation of this project but discovered that I wanted more colour and cute stuff so broke up my charm squares from the range and used all the cute and colourful ones from that too.  The green background fabrics are both Riley Blake pirate fabrics and I just love the Japanese apples!  Such a zing of orange.

This photo was taken when I thought it was finished.  More of that anon...I quilted it simply in the ditch and used a fusible, lightweight batting as it is going to be hung on a wall rather than used as a cot quilt, so the lightness and slight stiffness of that sort of material was perfect for this project.  I also added a hanging sleeve.

I sat around admiring my handiwork for a while (as you do) and came to the conclusion that a) it needed something else and b) I was bored and wanted a hand sewing project.  So lead by the naive charm and texture of the prints I embarked on some hand quilting detail. 

This was the result, not particularly clear and unfortunately with me in it because I forgot to take a photo at home!

Basically I hand stitched in orange embroidery floss around each of the orange diamonds, which really lifted the look.  Overall I was really pleased with this little item, it was a lot of fun to make!


Tuesday 19 August 2014

Many, many crosses...

I was hoping to get some better images of this quilt now that it has gone to its very happy owner because frankly I didn't have the space to photograph it properly. I really needed a balcony because it was a whopper. This is the finished product being shown at our guild's monthy meeting...

My client provided all of the fabrics after our initial consultation and a few suggestions about how things might look from me.  She wanted predominantly greens and blues with little pops of colour.  Crosses (being a very well prepared person she came with a pinterest board full of cross quilt designs) were a must.  After some discussion and thought we agreed that this "very now" interlocking cross design would bring a modern but also classic touch to her very classic and slightly retro choice of colours and fabrics.

After a lot of planning (thank you IPad apps) and thought about how I would approach such a large project I decided to piece the crosses as nine patches rather than rows.  It worked for me in this case and blocks fitted together like a jigsaw.  I made plenty of mistakes in placement so there was much reverse sewing, however errors were discovered earlier rather than later...like when the cross was embedded in the *middle* of the quilt! 

I took on this project with the caveat that I probably wouldn't be able to quilt it (ha!) and glad I did because by the time I had finished the top I could barely wrangle it single handed.  So off to my friend and long arm quilter it went.  We agreed on a more organic design in the mid green that runs through the quilt to give it some softness and contrast.  The leaf design can be seen in this detail:

I had pieced a backing out of some of the leftover green, unused turquoise (there was hardly anything left of the prints by this stage, it really came down to the line!) and some of the 30s feel fabric that didn't make it to the front of the quilt but was quite lovely.  Even choosing the binding took time!  We discussed plains, plaids and finally settled on the blue and white stripe that appears in some of the crosses.  Got to love a stripy binding. :)

So here it is - the oversized king sized quilt on top of my much smaller queen bed.  Doesn't really do it justice but you get the idea.  It looked much more at home on her giant bed in her beautiful bedroom.  Which was the point really.

Monday 21 July 2014

Modern Medallion Quilt Along - The Finishing Line!

Finally the last 3 borders are on my modern medallion quilt!  They were a lot less time consuming than the "Cross my Heart" border (thank goodness or it might have been a few more months before the end). :)

So here they are:

"Stuck in the middle"

 This was a regular kind of border, with a little twist of a different fabric inserted in the centre of each row.  Hence stuck in the middle.  I wanted something defining, that balanced the saturation of the orange border so I put a visual full stop there so to speak by using two different teal greens, both with polka dots. 

"Equal Rights"

This is just a peek at the next border.  This one was heavy on the low volume so the wonky 60 degree triangles (which came together quickly and beautifully) had to really stand up and be counted.  A couple of people in the quilt along group had mentioned that my quilt reminded them of a Summer garden.  Great compliment and a bit of an inspiration at this point.  I decided to go with my more colourful fabrics such as the Hello Tokyo print used in the wavy border.  I also introduced a final print not found elsewhere, the one with flowers and butterflies, which is from Love U by Deb Strain.  The colours worked perfectly at this stage and reinforced the garden idea.  The teal Mirror Ball Dot ensures there isn't too much whimsy and fluff and makes the orange border from the same range feel less lonely. :)
 "I Was Framed" is the last but certainly not least border on the quilt. 

It was possibly the most challenging when it came to choosing the "right" fabrics.  Technically it wasn't hard as it was very similar to "Stuck in the Middle".  I say "right" because really there is no definitive answer when making a quilt as I hope this series of posts has pointed out.  In this case I could have gone low volume and let the quilt wash into softness towards the edges or I could have reinforced the teal or...
What I chose was a lime green linen feel solid which appears very briefly as highlights in the crosses, geese and central medallion.  On the corners I introduced a final print not found anywhere but which has the perfect blend of greens and oranges.  This print from the Love range by Amy Butler was a bit of a gamble and took some auditioning with other fabrics because I knew I wanted it but didn't know if it belonged.  It is a little softer around the edges than the other, more graphic prints but I think it sits well with them.  Together I think they pull the quilt together, give a conclusion to the introduction of the centre and make it all make sense.

And here it is billowing beautifully in the breeze after the (what seems like incessant) rain.
If you are interested in seeing what others have done with this challenge then look here and follow the link up!  It's amazing how different one pattern can look...

Monday 14 July 2014

Modern Medallion Quilt Along (4)

Finally got back to my next medallion border properly today -  the "Cross my Heart" border.  I had had a varying number of strips, cross blocks ready to trim and finished blocks lying around for a while but I needed to crack on with assembling it.

This is what the (60) little cross blocks look like:


And yes, once again they are meant to be wonky.  I moved away from making as many orange ones in this border and more towards the teal as the quilt grows.  I love that spotty teal one with the peachicks in the background!

The blocks are fairly easy to make and great for chain piecing.  You don't need to worry too much about matching the + up and as long as the overall untrimmed block is more than 3.5" square then it's perfect!  The only real alteration I made to the pattern was to press all the seams inwards to make the cross pop more.  I had done this before with similar blocks to make presents for a Christmas wall hanging and it worked really well, so why change things?

The crosses, once sewn into borders, went onto the quilt traditionally, rather than wrapped.  I did pin them to add a bit of stability as there was quite a bit of stretch and give in each block making it a rather "flexible" border.  And here is the finished border on:


It's matching my vision so far so I am pretty happy with that.  Onwards and outwards!

Edit:  As the quilt along officially draws to a close (although there are plenty of us still going) check out the "mother ship" so to speak for link ups and other variations of this quilt.

Saturday 12 July 2014

Memory Quilt

Other projects seem to be pulling me away from the next border of my medallion quilt at the moment, in a good way of course and this baby quilt is one of them.


I was asked to make a memory quilt for a little boy's first birthday - he's a second child and the poor chap had missed out on receiving a quilt when he was born while his big brother had been made two!  His mum wanted it to be made out of his baby clothes from his first year to make it extra special and fortunately she was wide open to the idea of a raggy quilt, which saved a lot of time and tears trying to stabilise the various fabrics.  She requested green flannel for the back which was a lovely choice I think as it really pops through in the front and unites all of the squares.  It also works well with the (more numerous) spotted muslin squares which filled the gaps when I ran out of clothes...You don't get much fabric from size 000 onesies!

Where possible I fussy cut motifs or included cute details like pockets to make it a bit more interesting...


Pretty much every item was sentimental to his mum and being a mother myself I can really relate to this!  I even had a bit of a tear in my eye when I cut into that first bonds suit and couldn't imagine going through the process of making one for my own little boy...even though I think it is a fabulous idea.

I think the hardest but most rewarding square to make was this car one.  The car is a multi layered applique which was located on the baby suit's bottom - so I had to remove the elastic from it before cutting.  She was adamant that this one had to be saved though so I found a way. :)


I hope I am given the honour of making more memory quilts for people in the future.  They aren't the most "beautiful" or modern quilts but they are just so meaningful and full of love.  Which is at the heart of quilting really, isn't it?

Monday 16 June 2014

Modern Medallion Quilt Along (3)

This installment is the "Waving not Drowning" border.  Or should it be "Not Waving, Drowning"?  I thought it might be the latter when I embarked on this task but it turns out I had already unlocked skillz of awesome (yo!) in this area already.  How about that?

After reading a couple of related tutorials, mulling it over a bit, choosing my fabrics and having a bit more of a think I realised that I had learned the key technique while being shown how to join wadding perfectly.  It's the overlap cut.  Not very exciting to non quilt geeks but probably one of the most useful (and kind of weird) things you can learn in quilting...and versatile too apparently.

So that's what this border is.  An overlap cut, cut in a gentle wave...freehand of course.

 The freehand bit did terrify me slightly, not so much because it involved sewing curves again (I secretly kind of enjoy curves in sewing) but because it meant slicing through some of my favourite fabrics!

Particularly the "Mice on Bikes" by Lizzy House.  I just love the whimsy of those little mice on orange bikes...and the little 3 blind mice!  The outer wave is from the "Hello Tokyo" range of fabrics.

I am finding this whole process fascinating, the way the quilt is growing and changing identity and also saturation.  From what I have seen of other people's medallion quilts it seems this is as "dark" as it will get as the coming borders reintroduce that low volume background again.  Hopefully that will make my mice extra noticable!

Beep! Beep!

Looking back of what I have (and haven't) posted, I realised that this quilt slipped through the cracks...

I think I meant to photograph and blog about it when I finished it...but then its recipient, the cutest little 3 year old around, put it on his bed in the room next to ours and they have been inseparable ever since.  Well, actually I think it has been washed a few times but you get the idea!

It was made to go on his big boy bed to not so much replace the Spot quilt as keep it company apparently. I thought he had grown out of Spot (which he had, just not the quilt, which was a great compliment).  So Spot is now a bit small for his bed but perfect for snuggles on the sofa, while this emergency vehicle quilt is more his speed on his bed, being a king single bed topper.

The fabrics are all from the same range, bought with the central panel as a fat quarter pack.  I always feel I am cheating slightly by using all fabrics from the same range - it somehow doesn't test my creativity like choosing random fabrics does.  The current medallion quilt project is a prime example of this.  Anyway, in this case the challenge was to use the fabulous panel to best effect.  To do so I adapted a Cluck, Cluck, Sew design and instead of making the whole quilt out of it, I made a border using all the lovely fabrics from the pack.

It is quilted practically for quite heavy use in straight lines in a variegated thread in primary colours which works beautifully with the prints.  I also practiced my free motion skills by outlining each of those little vehicles on the panel.  It was a labor of love, trust me. :)  The binding is scrappy blues from the range as well.

I don't think he will be growing out of this one *quite* as quickly as the Spot, at least I hope not!

Sunday 15 June 2014

Modern Medallion Quilt along (2)

It's time to wrap around some borders!

So, a medallion quilt has a centre followed by a number of borders, plain or decorative, which radiate concentrically to the outside of the quilt.  The New York Beauty Contest forms the centre of the Modern Medallion and it is followed by two wrapped borders, known in the pattern as "Plain Jane" and "Drunk Geese".  They both fundamentally use the wrapped border technique, which was something new to me (again!)

Normally I just pop on two opposite sides, press and then two longer opposite sides and press and there you have it, a border.  This one is different in that you start each side at the edge, leaving overhang at the other and sew, leaving a gap at the overhang edge. You then work like this clockwise and then sew up the flappy ends to form a continuous, flowing border.  No tutorial here as there are some great ones already - like this one by MsMidge. 

The wrapped border isn't really show to its best on the Plain Jane, but it did give me practice:
I chose the tangerine fabric (Michael Miller's Mirrorball Dot in case you were wondering) to really make that centre pop as there is a lot of low volume background material in this quilt.  So of course I needed to turn up the (70s) volume in this border!

The next wrapped border is the Drunk Geese.  Or in my case "Lost Goslings" - spot the little guys trying to get home :)

I played around with this one a bit as I have done wonky/cut loose geese before.  (For those of you wondering about the "Drunk" title - it is a quilter in joke.  This pattern done traditionally (ie straight, measured and precisely) is called "Flying Geese".  Except these guys are wonky, freestyle and not at all precise. Someone mentioned making a cocktail in their honour on our facebook page, I reckon it would need Grey Goose vodka in it...mmm.

Anyway, I digress.  So the border is also wrapped (you can see it better here with the little geese flying in from the edges) but I have fiddled with the design a bit to make it my own.  As you can see, some flocks are flying towards each other, or away from each other, while the original pattern suggests all in one direction.  I wanted a bit more movement and craziness here as it was all looking a bit polite by the end of the Plain Jane.  I also swapped a lime and orange goose around to join their opposite flocks...just for fun.

I have used the citrus oranges and greens from the centre but also added a more leafy/grassy green and a blue -green to my palette, hinting at how I want the borders to now develop away from a lot of orange and lime towards more muted tones.  I am hoping this makes this central section really draw attention.  We'll see if it works.  That's the fun (and really scary) thing about medallion quilts - you don't really know where it will take you or if things will work out as planned.  I get the feeling it will be a Tim Gunn quilt - "Make it work!"


Friday 13 June 2014

Modern Medallion Quilt along (1)

Wow!  Two posts in one day after such a long time...must be feeling productive. :)  Possibly because the young man is now at an age where he is enjoying going off to play lego or draw for extended lengths of time and so my sewing machine and I are able to become reacquainted during daylight hours (when I am less likely to make a huge mess of something...)

Anyway, I digress.  This is, in fact, the first post of my progress in making my first medallion quilt.  I have the makings of possibly a second one in my work in progress container and so this seemed a good opportunity to try one on for size before committing to that layout for my improv blocks.  The quilt I am doing is also a huge skills builder - bonus!  If you are interested this is the quilt pattern in question.

So the story so far...First step after commitment and joining the Facebook quilt along page, was to choose my fabrics.  I wanted to challenge myself to only use stash.  Of course, it isn't such a challenge when you have *quite* a bit of fabric. *ahem*  Anyway, here was my selection:

 I had started out wanting to use green tones and make a fairly monochromatic quilt with low volume background and pops of green.  The greens needed something else so I widened the range to include those blue/greens on the left.  Still needed something...Orange!  Happy with my selection I printed off the pattern and...panicked.

The central focus of the quilt is a modern, wonky version of a New York Beauty block, renamed the New York Beauty Contest.  It involves freestyle cutting (yay!), curves (mmm, ok...) and foundation (paper) piecing (oh no!)

I am not a paper piecer.  I have done the grand total of one block of paper piecing which was under strict supervision and guidance at a retreat.  Every tutorial you read on the topic (including the one kindly written for this stage of the medallion quilt) says something like "Here are some pictures of me paper piecing and some very useful instructions but basically, it all sees rather weird, hard and counter intuitive until you do it for yourself and then it's fine, really so you just have to sit down and do it."  It is indeed all of those things.  It involves sewing on the wrong side of the foundation with the fabrics right sides together and then flipping them backwards to cover a void and somehow, just somehow, it works.  I am just glad that precision wasn't the aim here and that I could at least relax into my inaccuracies.

So here it is, stage 1, the central medallion - the New York Beauty Contest.


Thursday 12 June 2014

ABC - A Birthday Cushion

I have already shared photos of these items on my Facebook page because I was so excited about completing my first cushion I just couldn't hold off.  However, here is the little story around it.


 I have just completed the most gigantic crosses quilt for someone (this one deserves its own post once it is with its new owner).  While making it however, I did fall a little bit in love with the design.  I was once a skeptic - it is very "now" to make crosses and I have never been very hip and with it really :).  What I really love about the design, apart from the play of light and dark you can do, is the fact it really showcases your fabrics in an interesting way.  It also makes less modern fabrics look a little more contemporary.  Like these ones I used for example. 

Now, mustard and dark green are not really my thing (although, having said that, each of these fabrics came straight from my stash, many of them much whittled away so go figure).  However, the cushion was for my father's birthday and so my mother chose the colour scheme to match their new home.  Some of these fabrics appeared in a quilt I made for her so hopefully that means they harmonise a bit too.

I was pretty happy at my first attempt at a cushion.  Thanks to some advise from friends, lots of reading and re reading of cushion tutorials and a (wise) decision to make an envelope rather than a zip back it all worked out.

So much so I still had the inclination to make a matching mug rug for him as a surprise!

Melbourne!

I have just got back from a week in Melbourne with the young Mr and various combinations of my friend Liz and my husband.  It was mainly a holiday to give us the chance to introduce the young man to aeroplanes, trams and the fantastic dinosaur display at the museum.  Added bonuses were the Dreamworks exhibition, Zumbo's and the aquarium! 

I also made a point of making a craft pilgrimage to L'Uccello which was conveniently just around the corner from where we were staying and to GJ's discount fabrics, which I had heard a lot about and which was definitely worth the trek to East Brunswick.

So L'Uccello...the pictures say it all really:


It is the most beautifully presented haberdashery store I think I have every seen.  Every nook and cranny is packed full of buttony, ribbony, fabricy goodness.  The feel and theme is definitely vintage - the materials are soft and mellow, the buttons are mother of pearl, Bakelite or lovingly cleaned and restored originals from mid century.  Silk flowers and embossed gift cards burst forth from delicate displays and of course there is ric rac, bunting and threads galore.

This was my (restrained, yes restrained!) purchase:
Complete with beautiful carry bag.  There is felt, ribbons, buttons, Liberty fat quarters and glittery bird gift tags.  I left soooo much behind.  Honest.

GJ's was more your large fabric store kind of place.  Despite the "discount" title it wasn't cheap.  There were some $2 fat quarters I didn't buy for the sake of it.  Liz had some luck in the dance fabric section and I found some beauties on the bolts in the quilting section.

All of these are 1/2m cuts except for the foxes.  That's 1m because you can never have too many foxes. :)


Sunday 2 March 2014

Quilt retreat/Retreat Quilt

I have just returned from another wonderful quilting retreat in Dwellingup with the Perth Modern Quilting ladies.  It was somewhat warmer this time around, which meant there was more sitting around outside in the evenings, having a wine and a natter and soaking up the beautiful atmosphere and scenery.
I was too busy drinking and nattering so thank you Danielle for taking this gorgeous picture of us "hard at work"!

It wasn't always like this though.  There was a lot of sewing going on.  More of the hand variety than by machine on the first full day though as we lost power mid morning!  Fortunately it was restored during the afternoon so the sewing machines were humming once again.

Like many others I took many projects down with me but as with dessert, my eyes are always larger than my capacity and while I made good progress on some of them, others remained completely untouched.  Of course there were unanticipated completions too such as these foundation pieced blocks for one of the other ladies, who is making a "LOVE" quilt to donate to charity.

Not a great photo but you get the idea and hey, it was my very first attempt at foundation paper piecing!  I see more of this in my future for the odd project or bee...

I spent most of my time on two projects however, a small, naive style stitched quilting project (more on that when it is finished) and my piece de resistance - this quilt:

This is my first bee block. (It was a weekend of firsts!) As queen bee I had chosen a woven block design and requested it be done in yellows, greys and purples.  I received 10 blocks and made another 10 myself to make a decent sized lap quilt.  I made 8 of those blocks the first afternoon of the retreat.  When the power was on on Saturday I pieced the top and on Sunday I made the backing (that rich violet material with a slash of gold material which isn't visible), sandwiched the quilt, quilted it and bound it!  Phew.

During the process I liked it, fell in love with it, fell out of love with it, never wanted to see it again and then fell in love once more.  To such an extent it is going to be very hard to part with as I have promised it as a fundraiser for charity...

Anyway for now I am enjoying the fruit of my labour and will show it off to a few more people before I send it on its way.


Monday 24 February 2014

February already?

How did that happen?  I don't know about you but I feel like the weeks have been flying by and while I have a mass of projects on the go, nothing seems to be close to finishing at the moment...

However, I am off on retreat again this weekend so hope to have some proper show and tell after that is over!  I have packed about, ooh, half a dozen projects of various size and degree of completion in the hope I get something finished, or started, or at least worked on.  Except there is always wine, and chocolate and good conversation and I will be enjoying those too I expect.

For now I will just have to resolve to blog a bit more regularly if I can and to progress my projects so I have something to talk about!